Colorful Stairwell Makeover With Fabric Stair Risers
Nearly every home has stairs of some sort, and they serve the necessary function of getting foot traffic from one level to the next. But, here at Remodelaholic, we really love elevating stairs (get it?) to be a beautiful feature of a home, not just a set of steps. Our guest today did just that, giving her stairs a colorful makeover using an unexpected medium: fabric!


or a more colorful approach (plus trim to look like a stair skirt, tricky tricky!)

As a paint alternative: gel stain will give your banister a whole new look!

You can even build a new newel post, right around the existing one!

And of course, the stained wood treads are classic and so beautiful (although I’m certain I’m a little bit biased after all the hard work we put in to redo those stairs!)

See more stair remodels here, and here’s Sage to share all the details of her amazing stair transformation!

Colorful Stairwell Makeover Using Fabric
by Sage from Plaster and Disaster
I’m Sage, and I couldn’t be more thrilled to be here sharing at Remodelaholic today! Usually you can catch me over at Plaster & Disaster, where my better blogging half — Naomi — and I share our (mis)adventures as first-time homeowners in our fixer-upper houses, without prior experience and with a hefty dose of other responsibilities (like full-time jobs). From small crafts to major home improvements, we chronicle our numerous and incredible successes (while relying heavily on hyperbole), but also the inevitable disasters that happen along the way. Be sure to check out some of our favorite projects and fondest disasters!

Naomi and I are both working our way through our respective homes one room at a time, and one of the spaces I recently took on was my hallway and stairwell. Here’s the gorgeous space I started with:
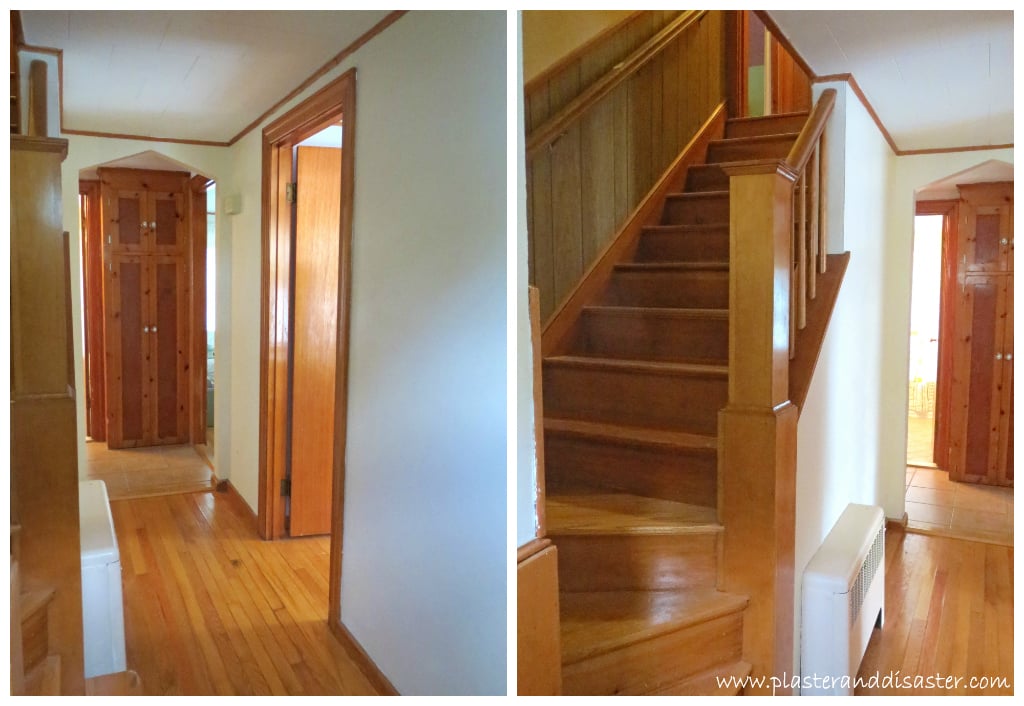
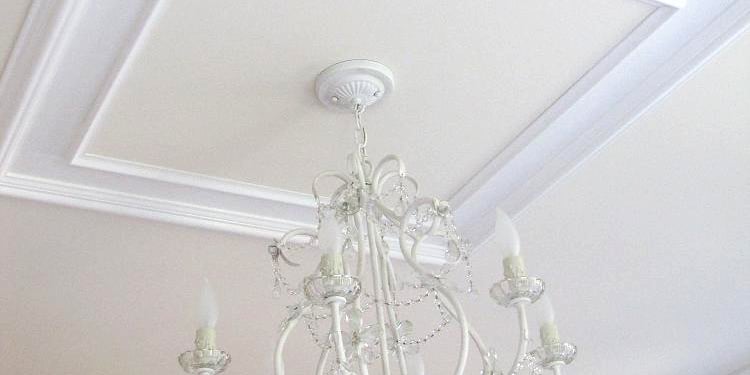
I had visions of something bright and colorful, and so set to work changing pretty much everything — painting all the walls, trim, and paneling, replacing the light fixtures, converting the tiny pantry into colorful built-in shelves, painting the inside of the front door a cheery color, and adding new large-scale art with DIY frames. If you’d like to read more about the whole process, you can check out my pantry transformation and the final hallway reveal and finishing touches over at Plaster & Disaster. But today I’m sharing one of my favorite projects: using fabric to transform the stairs!

In all my scheming and dreaming about the space, I came across so many inspiration images of colorful and patterned stair risers and I knew I wanted to do something similarly exciting. Most seemed to use either stencils, wallpaper, or ceramic tiles. I immediately dismissed stenciling because I know it’s so labor intensive and I just didn’t have it in me after all the painting I’d done on the walls, paneling, and trim. Ceramic tiles also seemed like they’d be quite an undertaking given the task of cutting them to the exact right size, so I figured that wallpaper was probably the way to go.
But as I started researching options, I realized how expensive wallpaper can be — especially fun, graphic wallpaper. Also, it’s usually between 21″ and 27″ wide for a roll, meaning that there would be a seam in the middle of every single riser. You know what isn’t expensive, comes in lots of awesome patterns, and is usually 40″ wide or more? FABRIC.
Yep, I decorated my stairs with strips of fabric. And now I will tell you how I did it so you can immediately rush out and do the same!
First, I picked out the fabric. I love the selection and prices at Fabric.com — there’s a lot to weed through, but you can find some really great stuff. After lots of deliberation, I settled on the Sunprint Feathers in Teal. Here’s the photo from the website:

It looks green here, but I knew from the product reviews that the color was bluer than it shows on the website, so I thought it would tie in nicely with the built-ins I’d painted at the end of the hall. I calculated that I would need 2.5 yards, which came to $23. TWENTY-THREE DOLLARS. From my research, I knew that this amount of awesome wallpaper would have cost me at least $100, probably a lot more.
I decided to use mod podge to adhere the fabric to the risers, since it seemed like people have had good experiences with fabric + mod podge + wood to do things like decoupage table tops. I bought a large container of matte finish mod podge, because I knew I would do a protective top-coat and I didn’t want the stairs to be glossy. But that would probably look cool too!

Here’s how the whole thing went down one Saturday afternoon:
Step 1: I washed, dried, and ironed the fabric.
This is what ironing looks like!

Step 2: I read a few tutorials on using mod podge for decoupaging with fabric that suggested first coating the back of the fabric with a layer of mod podge and letting it dry. The benefits promised were twofold: this would prevent the fabric from fraying when cut into smaller pieces, and it would make the fabric stiffer and easier to work with. I was a little skeptical about whether this was fully necessary, but I figured I’d give it a try so I laid the fabric out face down on a big table we have in the basement, and brushed on a coat of mod podge. It took awhile and the fabric puckered and wrinkled, but I persevered (and the wrinkles all worked out when it came time to put the fabric on the stairs).

After coating the whole thing, I let it dry about 45 minutes. When it was dry, it had a heavier feel, more like paper than fabric — this made it a lot easier to work with down the road. And when I started cutting, indeed there was no fraying. So even though it adds time and uses up a fair amount of mod podge, I definitely recommend taking this additional step.
Step 3: Once the fabric had dried, I started cutting it out and applying it to the stair risers, one piece at a time. Every riser was a little different in size, so I went riser by riser measuring, cutting, and gluing. On each riser, first I used my sewing measuring tape (which is more flexible than a regular measuring tape) to measure the length and width of the riser and then mark that on the back of the fabric and cut it out to size.
Step 4: Next I painted the riser with a liberal coat of mod podge. It doesn’t need to be perfect and it’s okay for it to get on the stair treads, since it dries clear and wipes up with water. It stays wet long enough to coat the whole riser at the same time.

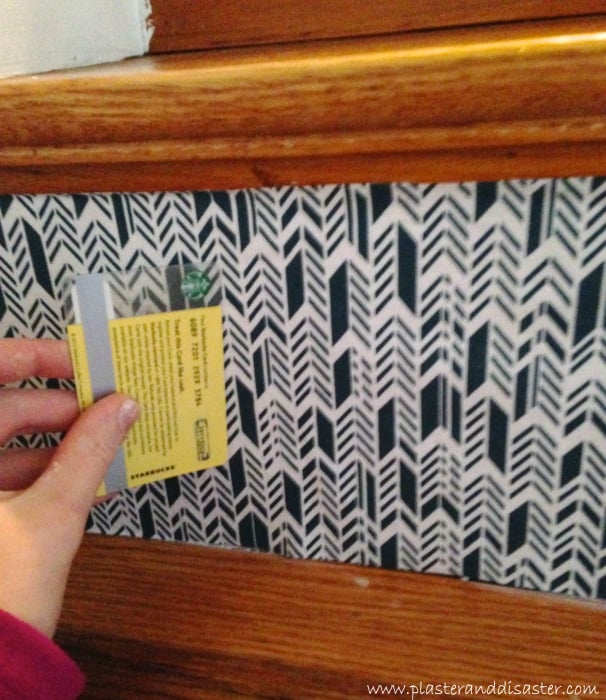
Step 5: I started every riser in the top left corner, placing the fabric so it aligned perfectly in that corner and then working from there. My process was to gently press the whole length of fabric against the sticky riser, but the mod podge stayed wet long enough for me to slowly reposition the whole thing as I worked across to it stretch it out and eliminate bubbles. I used a credit card (errr, an empty Starbucks gift card) to smooth out the bubbles and make sure the fabric was firmly pressed against the riser (especially along the top and bottom edges).
I usually found that I had a little excess fabric along the bottom and right edges because the fabric stretched a little during the process, but this was easy to trim away with an x-acto knife later (just make sure to do it before the mod podge dries).
The only wrinkle in this process was that the bottom step was a little longer than the width of the fabric, so I had to use two pieces of fabric. I cut them so that the pattern would match as much as possible, and the seam is really not noticeable.
Can you see it? I know right where it is, and I still have trouble.

Step 6: After completing these steps for every riser, I jumped around with joy and made my husband stand and stare at it with me for a good long while. These kinds of celebrations are important for keeping morale up when you’ve spent a month contorted on your hands and knees in that darn stairwell and finally it’s looking awesome. (Note: the rest of the month was devoted to painting, not the fabric project!)
Step 7: As mentioned previously, I trimmed off excess fabric with an x-acto knife.
Step 8: To protect the fabric from getting scuffed up, I went back over each riser with an even coat of mod podge. This converted the surface from a soft fabric feel to a harder lacquered texture, but it looked exactly the same (since I used matte mod podge — if I’d used gloss, it obviously would have created a glossy surface). I kept a pair of tweezers on hand to pick off a few stray cat hairs that got caught on the risers, since I didn’t want that solidified in the mod podge when it dried. This step isn’t necessary if your floors aren’t as gross as mine.
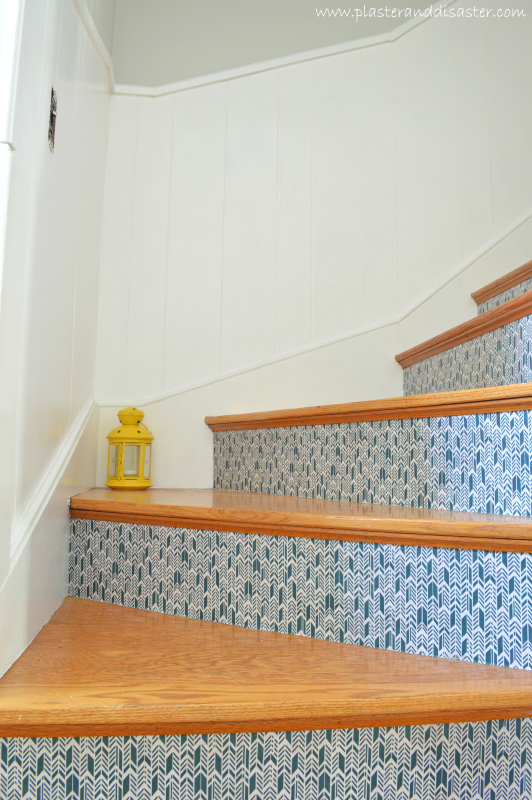
And that was it! All told it took about 6 hours, and cost $35 ($23 for the fabric and $12 for the mod podge). Of course the rest of the hallway projects took a lot more time and upped the budget, but this one piece really feels like the crowning jewel of the whole makeover and it was so cheap and easy. You could end up with so many different looks depending on the fabric you choose — if you give it a try, I’d love to see how it turns out!

 ————————————-
I love how this looks and how it brightens up your stairway, Sage! Thank you so much for visiting and sharing with us!
Remodelaholics, click over to Plaster and Disaster because you are going to fall in love with Sage and Naomi! While you’re there, check out this so-easy coordinated art in the bathroom, the temporary (but beautiful!) kitchen backsplash, and the pros and cons of bamboo flooring (for when you’ll need it!)
Want to be featured? Link up here and submit your best project here.
Lorene has been behind the scenes here at Remodelaholic for more than a decade! She believes that planning projects and actually completing them are two different hobbies, but that doesn't stop her from planning at least a dozen projects at any given time. She spends her free time creating memories with her husband and 5 kids, traveling as far as she can afford, and partaking of books in any form available.


Absolutely brilliant!
Thanks so much, Gina!
It looks awesome. It really makes an impact and a dramatic (fun) statement. I would have to pay someone to do it for me though. I am terrible at cutting straight lines and don’t have that much patience!
Thanks Andrea! Doing a coat of mod podge on the whole thing beforehand definitely made cutting the fabric in straight lines so much easier — more like cutting paper than fabric. But if you ever decide you want to hire someone to take on your stairs, let me know! 🙂
Thanks so much for sharing Sage’s stair makeover! We had so much fun with this project (yes, I lived vicariously through it) and it turned out so well… I wish you could all see it in person!
Thanks, Naomi (and Sage!) Such a fun transformation!
Agreed, thank you so much!!
What if you want to change the material later or do something different? How would you take it off? Or would you have to leave it and put something over it?
I have the same question. Can u take it off easily if u move. Wood is easier to sell then a pattern?
It’s definitely not easily removable, so if you’re looking to keep things easy for selling then I’d recommend going the starch route rather than mod podge! We certainly have resale in our mind for down the road, but have decided that we want to do the things in our house that make us happy without thinking *too* much about hypothetical future buyers. And the wood on these stairs was in really bad condition, so it wasn’t much of a selling point to begin with 🙂
It can’t be removed very easily, so it would need to be covered over. However, if you wanted something removable then I think starch would be a good option instead of mod podge — I’ve heard good things about how temporary it is, but it might not be as durable as the mod podge option!
Thanks, Sage!
I used starch on some fabric insets I did on a piece of furniture, probably 15 years ago, and it has worn perfectly. It certainly doesn’t get the wear and tear that stair risers would, but I would think it would still work well.
Thanks for sharing, Kathryn!