No Sew DIY Magnetic Curtain for a Half Door Window

This easy no-sew DIY magnetic curtain tutorial shows how to make your own half door window curtain — without any holes in the door or any special hardware!
For more DIY window covering ideas, see all our DIY curtain ideas here and be sure to check out this lace DIY privacy window film and how to DIY faux stained glass windows. Plus check out our Crafting Ideas Project page for all types of crafts.

I love having LOTS of light in my home, so I really like entry doors with windows. But, sometimes you need to lessen the light a bit, or cut down on the line of sight into your home. So you can use a privacy film like this, or you can be super smart and use a DIY magnetic curtain like this one — and it doesn’t take any sewing, either!

This guest post is part of our All Things Windows series which includes DIY curtains, tips for hanging curtains at the right height and width, and more DIY tutorials to make your windows look great! See all of our window treatment tips, tricks, and tutorials here to learn how to install a window, how to trim a window, and more.
Easy No-Sew DIY Magnetic Curtain
by Gina of Charming Zebra
Hello, I’m Gina. Visiting from the home decor and DIY blog, Charming Zebra. I have always been mildly obsessed with homes, design and beautiful architecture.
A few years ago, I stumbled upon reading my first home decor blog. And what a discovery! I had just opened the door to another world of individuals who loved design, decor and DIY as much as me. I found I wasn’t alone in dreaming about paint colors and watching movies solely for the purpose of seeing the home interiors. Soon after, I launched Charming Zebra. [Remodelaholic note: since sharing this post with us, Gina has stopped blogging and shutd own her site, so the links to her site have been removed.]
I believe a room put together with eclectic pieces and items with personal meaning is more appealing than a generically styled space. I think creativity and DIY are the best components in designing a room that is your ideal version of home, that is essentially you. I like projects that are relatively simple to do, but that pack a design punch.
One of my favorite projects from my own home was Installing Wainscoting Without Power Tools. Not everyone is a skilled woodworker, has a handy partner at home or is fortunate enough to own a garage full of power tools. Installing wainscoting in my dining room really changed the look of the room and was an easy project to do by myself.

This post contains affiliate links. Learn more and read our full disclosure policy here.
DIY Half Door Curtain with Magnets
The Super Easy No Sew DIY Magnetic Curtain Window Shade was a project born out of necessity. In our kitchen eating space, we have a metal door that opens up into the backyard. We use it multiple times a day and I love the window allowing the beautiful daylight to stream through.
Well, during the Summer season, that softly streaming daylight would wickedly transform into the searing rays of the sun. And my little ones would cry during mealtime that the sun was burning their eyes or the back of their necks. Those picky kiddos.

So, in an attempt to save the retinas of my poor suffering children, I devised a way to cover the window during the hottest part of the day. I wanted to be able to completely remove the window treatment when the sun wasn’t quite so intense.
I didn’t want to attach any permanent hardware or have the bulk of a magnetic curtain rod or do any complicated sewing. And I wanted the blind to be somewhat decorative. So an old t-shirt held up with duct tape just wasn’t going to work.
I ended up creating a super easy DIY magnetic window shade curtain design that is specifically for metal doors. This blind requires no sewing and is attached by hidden magnets.

Super Easy No Sew DIY Magnetic Curtain Tools and Supplies
- Fabric of your choice – I found mine at Hobby Lobby. (Heavier fabric like duck or outdoor fabric would work the best. I made a different blind with a thinner cotton fabric once and wasn’t quite as happy with it.)
- Fabric glue – I used Aleene’s Fabric Fusion from Wal-Mart. I’m sure other brands of fabric glue would work just fine, too.
- Magnets – I used 6 from a larger pack of nickel sized magnets from Hobby Lobby. There are smaller and larger magnets — just be aware of the danger of smaller magnets around babies and toddlers!
- Fabric scissors or pinking shears
- Any additional trim or embellishments (optional)
- A plastic mat or wax paper to protect your work surface
You can possibly finish the assembly of the Easy Blind (with the hemmed sides) within 20-30 minutes. And with the Super Easy Blind, you can be finished assembling it within 10-15 minutes or so. The time-consuming part is the glue drying. You will want to let it sit for a number of hours or overnight until ready to use.

How to Make a DIY Magnetic Curtain
Super Easy vs. Easy No Sew Curtain
There are two ways to make this blind. The easy way and the super easy way.
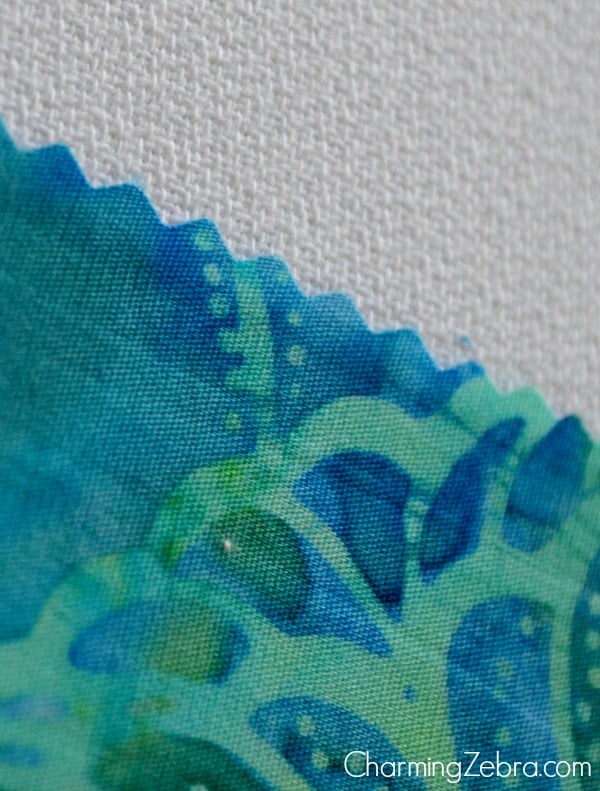
- With the super easy way, you are going to forego any hemming and cut out the fabric with pinking shears. These are special fabric scissors that have a serrated or zig-zag blade that lessens or even prevents fraying depending on the fabric used. With the pinking shears, you cut the fabric to the exact width, but still add the extra fabric at the top. Note that the zig-zag edge will be visible.
- With the easy way, you are going to use regular fabric scissors and add another half an inch or so on each side edge of the blind to account for the hem, while still adding the extra fabric at the top for the magnets. This edge looks more nicely finished so I did it this way.
Step 1: Measure and Cut the Curtain Fabric
To make your own DIY magnetic curtain, start off by measuring the window and the space you want covered. (I like having a bit of light shining through the bottom, so I made my blind a bit shorter than the full window.)
Then cut the fabric to the appropriate size, adding an additional inch and a half of extra fabric at the top of the blind and the appropriate extra fabric at the sides depending on whether you are using pinking shears (the super easy way) or regular scissors with extra fabric (the easy way).
The magnets will go at the top so make sure you have enough space above the window with the fabric to do so.
Important Tip: If you are using a bold pattern, make sure it is centered how you want it before you cut the fabric.
Step 2: Press (Iron) the Side Hem
To hem the sides and hide the unfinished edges, lay the fabric pretty side down and fold the edge over about 1/4 an inch and iron it. Then fold it over again to make a smooth edge and iron it again. Do this on both sides.

Step 3: Determine Magnet Placement
The next step is to determine how many magnets you are going to need to hang the blind. The simplest way to do this is to place the fabric piece over the window and start adding magnets along the top until the blind is in place and doesn’t shift when the door is open and shut.
The magnets need to be dispersed along the top for support. Start out with 6 nickel sized magnets and add more if needed.

Step 4: Glue the Side Hem
Once you have determine the magnet count, it’s time to pull out the fabric glue. You’ll want to cover your work surface first with a plastic tablecloth or wax paper.
Start gluing the sides first, if you are doing the easy blind.
Important Tip: The glue is quite messy and a bit of a pain to use, but dries well. Be patient.
Step 5: Glue the Magnets in the Top Hem
Next, position the magnets across the top and glue them down.

Add a dot of glue to the top of each magnet and in between each one. Then fold over the top and smooth it down.
So to recap: the magnet is glued to the fabric on bot sides, and the fabric is glued to itself in the spaces between the magnets.
Now you just need to let it dry.
Step 6: Hem the Bottom or Embellish

You can leave the blind as is or embellish it with trim.

Or add fun pom poms.

I opted out of the hem at the bottom and added a string of fluffy white pom poms on mine, instead.

I like having a bit of light shining through the bottom, so I made my blind a bit shorter than the full window.

And a happy accident. The blind ended up being the perfect size to store under the window when it’s not in use.

I started photographing before the blind was fully dry so you may spot a few glue marks at the top. Once it dries, the glue is clear and the fabric straightens out.
Seriously, this is such an easy window covering to make. And it’s super easy if you use the pinking shears and don’t have to worry about hemming the sides.
This truly is an easy project that you can make as simple or as elegant as you wish. Best of luck!
————————————————
Thanks, Gina! Such a great solution to a common problem of how to treat the windows on entry doors!
Visit Gina over at Charming Zebra to see more of her lovely home, like her chalkboard wall (love the scalloped top!) and her industrial style fashionista freestanding closet.
See all our All Things Windows series posts below, plus more window DIYs and tips and tricks.


Super Easy No Sew DIY Magnetic Curtain for a Half Window Door

Ingredients
- Fabric of your choice I found mine at Hobby Lobby. Heavier fabric like duck or outdoor fabric would work the best. I made a different blind with a thinner cotton fabric once and wasn't quite as happy with it.
- Fabric glue I used Aleene's Fabric Fusion from Wal-Mart. I'm sure other brands of fabric glue would work just fine
- Magnets I used 6 from a larger pack of nickel sized magnets from Hobby Lobby. There are smaller and larger magnets — just be aware of the danger of smaller magnets around babies and toddlers!
- Fabric scissors or pinking shears
- Any additional trim or embellishments optional
- A plastic mat or wax paper to protect your work surface
Instructions
Step 1: Measure and Cut the Curtain Fabric
- To make your own version, start off by measuring the window and the space you want covered. (I like having a bit of light shining through the bottom, so I made my blind a bit shorter than the full window.)
- Then cut the fabric to the appropriate size, adding an additional inch and a half of extra fabric at the top of the blind and the appropriate extra fabric at the sides depending on whether you are using pinking shears (the super easy way) or regular scissors with extra fabric (the easy way).
- The magnets will go at the top so make sure you have enough space above the window with the fabric to do so.
- Important Tip: If you are using a bold pattern, make sure it is centered how you want it before you cut the fabric.
Step 2: Press (Iron) the Side Hem
- To hem the sides and hide the unfinished edges, lay the fabric pretty side down and fold the edge over about 1/4 an inch and iron it. Then fold it over again to make a smooth edge and iron it again. Do this on both sides.
Step 3: Determine Magnet Placement
- The next step is to determine how many magnets you are going to need to hang the blind. The simplest way to do this is to place the fabric piece over the window and start adding magnets along the top until the blind is in place and doesn’t shift when the door is open and shut.
- The magnets need to be dispersed along the top for support. Start out with 6 nickel sized magnets and add more if needed.
Step 4: Glue the Side Hem
- Once you have determine the magnet count, it’s time to pull out the fabric glue. You’ll want to cover your work surface first with a plastic tablecloth or wax paper.
- Start gluing the sides first, if you are doing the easy blind.
- Important Tip: The glue is quite messy and a bit of a pain to use, but dries well. Be patient.
Step 5: Glue the Magnets in the Top Hem
- Next, position the magnets across the top and glue them down.
- Add a dot of glue to the top of each magnet and in between each one. Then fold over the top and smooth it down.
- So to recap: the magnet is glued to the fabric on bot sides, and the fabric is glued to itself in the spaces between the magnets.
- Now you just need to let it dry.
Step 6: Hem the Bottom or Embellish
- You can leave the blind as is, hem it with glue, or embellish it with trim or add fun pom poms.
Lorene has been behind the scenes here at Remodelaholic for more than a decade! She believes that planning projects and actually completing them are two different hobbies, but that doesn't stop her from planning at least a dozen projects at any given time. She spends her free time creating memories with her husband and 5 kids, traveling as far as she can afford, and partaking of books in any form available.


Maybe you could add more magnets half way down that would allow you to stick those at the top of the door too if you wanted a roman shade type of effect to open it when the kids arent at the table.
I did this project, but with blackout fabric behind it… I love mine…. I used a printed fabric as well and the only this is I had a hard time lining up the pattern for perfectly straight lines. My hubby say they are not bad at all.
You did a good job! I am just curious how do the magnets work on the wooden door?
I was wondering the same thing!
It’s not a wooden door. It’s metal
Can you add a magnetic curtain rod through the top by making a pocket and attach it that way to the door?
I imagine you could!
Clever lady!Bravo!!????
Is there a way to print this projects instructions. There are so many ads I keep missing steps. I would love to try this project but the ads are just overwhelming. Thanks.
Hi Katie,
We’ve just added a printable guide to this project, so you can click the “jump to guide” button at the top or scroll down to the bottom and then click “print recipe” to print the instructions. Thanks for the feedback and we’d love to see pictures of your completed DIY magnetic curtain!
THANK YOU, so much, for having a printable instruction sheet!
You’re welcome, Tracey! Thanks for letting us know you like that feature.