Small Bedroom Remodel; Retro Remodel
This room was by far the fastest project that we ever did. It is funny how after 3 years of remodeling a house, you actually learn how to do things quickly and efficiently, that and at this point we had all the tools that really made things simple.
When we first walked through the house we didn’t even enter this little room. We couldn’t, it was SO full of stuff that we actually couldn’t even enter the room. So, it was nice to actually see the room for the first time … and all the carpet (you will understand in a second)
This project was the first without a huge demo. We removed an old chimney and carpet, and more carpet and MORE carpet, the front of the closet and that was about it.
We decided that it would be far easier to just cover the old walls than deal with the mess of removing them. Also, we actually had to do more building out than anything else in this room because of the strange foundation which you will see in just a second.
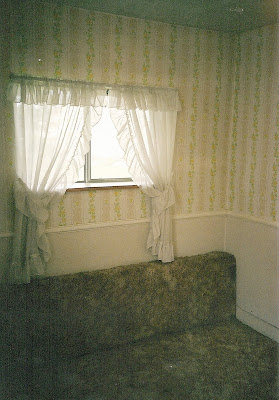
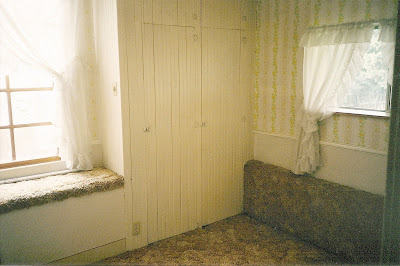
Here are the first few shots of the room, I apologize for the quality, this is before digital and I had to scan them in, and they were bad to begin with.
Why yes that is carpet on the window bench and wall. And it was the first thing to go.
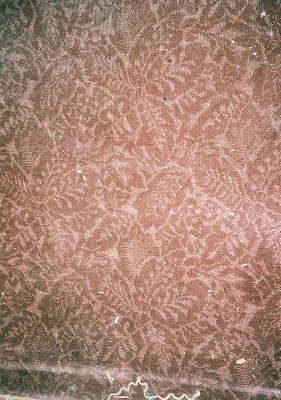
When we pulled it up we found the most beautiful wool carpet. It was ruined unfortunately. I wonder if it could have been repaired, either way we didn’t have the money for it but here is a picture of the carpet.
Within the first year, Justin installed some carpet that we got from my mother’s friend. It was only a few years old she was replacing it with vinyl flooring. It was free, and you know you can’t beat that.
After that, we used the room as a closet and dressing room for about 2 years. We don’t really have very many pictures, but we built a little free standing hanging rack and it was about 7 feet tall. Here is Kitty sitting on top of it, I think it is funny. (this house was a cats dream, so many places to explore)
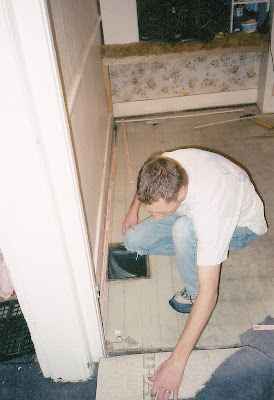
We took out a few things almost immediately, like the board under the window seat, I think we were planning on taking the whole thing out, but that is when we found out that the foundation was hidden underneath it.
Why yes, every inch of the interior of that closet is covered with random orange
(and below purple) carpet remnants, very plush wouldn’t you say?
We took the closet doors off because the closet was less than 16 inches deep, which made it almost useless, hangers are wider than that. I built the entertainment center from them, I showed you the in the master bedroom remodel post. We used the adorable hinges in our hall remodel.
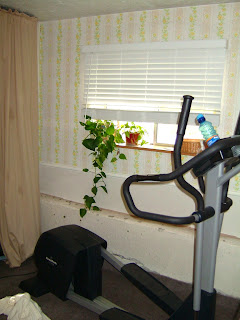
After we rebuilt the master closet, we moved our exercise equipment into this room.
Here is what it looked like for a while.
You can see how the foundation juts out into the room here, at a sort of random height.
When we were finally ready to work on this room, the first thing we did was remove the chimney stack, A new roof had been built over it, so from the outside you didn’t even know it was there, but it was an eyesore in the room.
Well, when we started taking it out, I guess at some point previous owners had filled that baby up with about 70 pounds of SAND! and it was filthy, we started taking out the brick, and sand just started pouring into the room. We got a little dirty (understatement). Oh, and yes we are wearing bike helmets… Uh… I was worried we’d have our head smashed in, and these were the closest things we had to hard hats!
Uh, yeah, those aren’t flattering pictures, but at least now you can sorta see how dirty we were… sorta.
We found some holes for pipes, (more under the wallpaper) I really don’t understand what this room was. But you can also the all the layers of wallpaper, and old paint colors in this picture and I always think layer pictures or fun.
Well we got it out and so we had a huge gaping hole in the ceiling, actually though, there were two. Over the window seat there was this little arch thing that made absolutely no sense. At some point the ceiling had been lowered, but they chose for a “design feature” to have this little thing, for lack of a better word. (you can kind of see it in the picture below, I never really photographed it, sorry!
We really wanted to raise the ceiling back up, but we ran out of time. Instead, we just patched the holes.
We removed the front framing of the closet entirely.
By the way, you can see the purple carpet tiles that were on the foundation better in the second picture. These were the same tiles that had been at the top of the stairs on the landing, that I never got a photograph of.
Then we framed in the new front of the now a normal depth closet.
And I had Justin frame in the foundation. I decided to bring the foundation height up to an average wainscoting height.
When it comes to drywall, we covered all the existing walls without removing the old stuff, It was the best decision we ever made. It went SO fast and was SO much cleaner!
After taping up all the seams, we primed and started adding moldings. (Oh and I finally painted that one wooden window… It took forever, and even though I used a primer, it kept yellowing the paint. urgh! But it turned out pretty decent in the end)
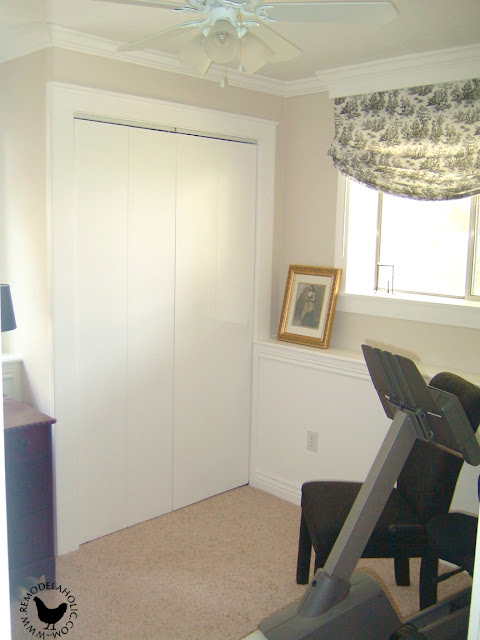
You can see the interior of the closet here, we decided to have a shelf at the height of the foundation, and a shoe shelf or what not below. We figured this would be an office or kids room either way.
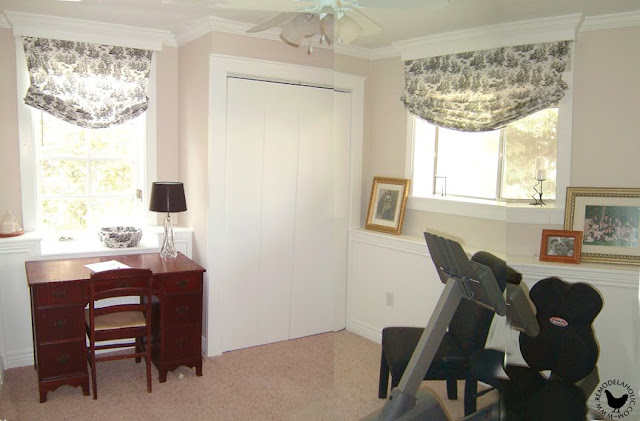
One of the major problems with this room was the difference in windows. One is wood, one metal, I couldn’t afford to change them out. The one thing I realized, I could at least mask was the different dimensions. By visually bringing one down and the other up, so the molding may look strange, but I promise it works in the end.
We decided on Valance boxes again, I have to admit, I like the formality of them when done right. But the other reason was the fact that the tall window was almost exactly the height of the ceiling, which made it hard to install the crown in the room. However, with the valance boxes, we could continue wrapping the crown around the whole room without strange stops and starts. This also helped to make the windows look more the same than they were.
Now we just installed all the moldings and painted…
Lastly, we installed new carpet. We did find one other fun secret. Under the closet, was a door to the cellar, and in the cellar you could see big grooves in the floor where there had been a ladder. The cellar was built in two sections. But this portion was part of the second addition to the house. The other portion was the third addition to the house. It was fun to piece some of these things together.
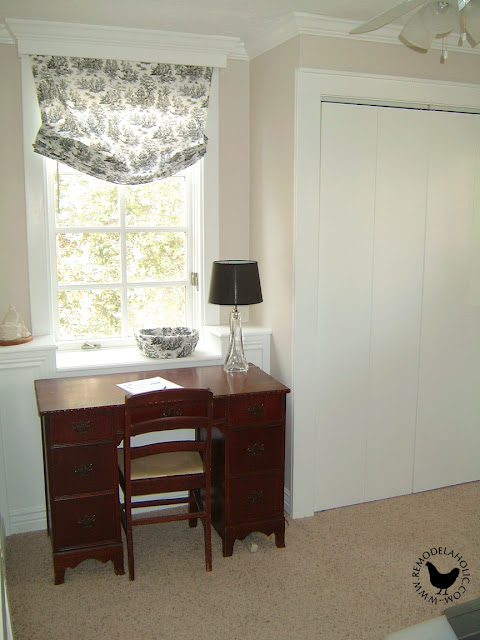
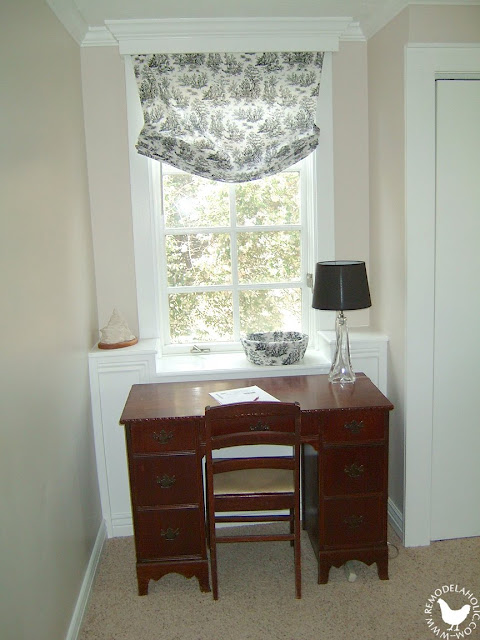
Ready for the finals?
And I made a quick composite image, not perfect but you get the idea.
What do you think about the windows now?
That was my favorite change in the room They actually appeared to be the same height.. Finally!
Do you like the room?
Cassity Kmetzsch started Remodelaholic after graduating from Utah State University with a degree in Interior Design. Remodelaholic is the place to share her love for knocking out walls, and building everything back up again to not only add function but beauty to her home. Together with her husband Justin, they have remodeled 6 homes and are working on a seventh. She is a mother of four amazing girls. Making a house a home is her favorite hobby.

.jpg)
.jpg)
.jpg)
.jpg)
.jpg)
.jpg)
.jpg)
.jpg)
.jpg)
.jpg)
.jpg)
.jpg)
.jpg)


>Wow! Way impressive! It looks incredible! I love the pics of you guys too!
>Great job. It was obviously a lot of work, but well worth it. Looks great!
Love,
Susan and Bentley
xxoo
>This room turned out get.. I love it.
Thanks for joining Get Your Craft on Thurs. Please join me next week for another great party.
>wow! that was a lot of work but the room looks beautiful. I like the colors you used, they make the room look cozy. I like the picture of the dirty faces, very funny.
>Oh wow that looks awesome!! Great job!!
>Oh goodness! You guys have so much patience and energy. I think I would have given up after pulling up the old carpet. It looks gorgeous and you two look so funny with your dirty little faces 🙂
>What a difference. The room looks crisp and clean.
Carol
>Oh wow! What a difference. I do miss the window seat, though the first one was really tacky, I hoped you'd make a really lovely one in the redo. Not, of course, that the little desk isn't very nice sitting there.
>Hi Kim…
Ohhh…this is one of my favorite posts in all of Blogland, my friend! I remember really going through it when you first posted about it! This is just one of the most awesome makeovers that I've ever seen! You and your honey did a great job!!! I always love to see the transition of a space and you documented it so beautifully with all of your photos! Some day you and honey will look back on these and have such fun memories!!! Your room turned out fabulous! I don't know if I mentioned it in my first comment but I love how you did the build-in under the window…gorgeous!!! Thank you so much for sharing your beautiful home and its transformations with us for Sunday Favorites…a real treat and so inspirational!!!
Warmest wishes,
Chari @Happy To Design
>the transformation is awesome! thanks for linking up to check me out saturdays. http://www.iamonly1woman.blogspot.com
>You are so good at your tutorials. I really love the curtains by the way. You should have a tutorial on how to put those together.
>Fantastic! Also, love the plans for your entrance. See you Sunday for the recipe link!
S
xo
>WOW! Fantastic remodel!!! I always wonder about the original crazy reasons for oddball things done by previous homeowners!
BTW, I was also faced with 3 different window types during a recent reno… one wood, one vinyl, and the 3rd aluminum. My one saving grace was that all 3 were white. After the addition of some white trim molding, all the eye really sees are white windows.
I know it sounds like more work, but if it were me, I'd paint the aluminum window to match the wood window so that it doesn't catch your eye.
Great reno!! 🙂
>Wow, that is amazing!! What a transformation and real renovation. Great solution for the windows. GREAT work!!
You are both so creative and true magicians!!!!
I love it!!!!!